Tuesday, April 24, 2012

Tool Tuesday - Scissors

I want to start posting more but with two little ones underfoot I am not always able to complete projects quickly.  So I decided to start posting "Tool Tuesday" when I don't have a project to share.

Scissors


I good pair of scissors is important as it can make a difference between a straight smooth line and a jagged one that does not line up when you need to sew.

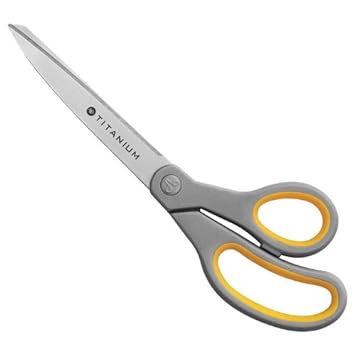
These are my scissors.  The work well and the did not cost very much.  There is a big rule in the house that no one is to use them unless they are cutting fabric!  I have lost more then one pair of scissors to them being used on other things!
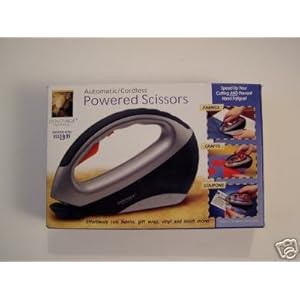
I found some funny things when looking at different types of scissors  The first one is something called Powered Scissors.  Not sure I would trust it to cut strait!
These have a laser on them and claim to help you cut strait.  Again I am not sure how they work as there where no reviews but that seems like a lot of technology for a pair of shears!


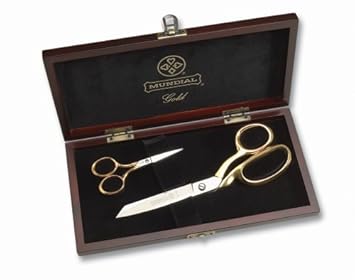
These are my dream shears.  They are beautiful, in a box, and gold!  I love that there is a separate pair for cutting thread.  I hate grabbing my big scissors to cut threads as I am sewing and I hate the thread cutter on my sewing machine.
Monday, April 16, 2012

Easter Outfits 2012

I decided to make my daughter a dress for Easter.  Then last minute I decided to also make a tie, vest, and pants for my son as well as a simple shrug for my daughter.  I found some tutorials online.  Some I used completely while other I used as a guideline.

Easter Baskets:  I love for the kids to get a new outfit with their Easter baskets every year.

  
Bella outside and at church with her Bible.

Bear in his outfit that ended up being very shiny!


The kids in their outfits together!

Here are the links to the posts and tutorials that help me make their outfits!

  • Boy's Vest - I used a safety pin instead of buttons I ran out of time
  • Boy's Pants - I can finally put pants on Bear and they did not fall down!!!!
  • Boy's Tie - I love this one!  I made mine with elastic.  It is so awesome!!!!!
  • Girl's Party Dress - Daddy picked out the fabric for the main part of the dress and Bella loved it!
  • Shrug - I altered this to be Bella's size

Monday, March 26, 2012

My Clutch

I had a special date night coming up with my husband and I wanted to make a clutch to go with my new dress!  I decided to try and make one with out a pattern!

First I picked up my supplies:  Green for the outside, purple lining, batting, fusible interfacing, and a fancy button.
Then I started to cut out the fabric. Tip #1  Measure!  Ooops... First I made it too long, then it ended up crooked in the end. (I still love it though.)

I had decided to make the outer part have pleats in it to add interest.  I started by pinning 3 pleats in the "middle" (I did not measure them again and so they are off center on mine.)  Tip #2 Sew pleats into place underneath... I kept having to fool with mine and make them sit still.... in the end that caused them to be in the wrong place.... They still look nice though!

Next, I cut out the lining to the same size as my green out fabric.  (Make sure you make it strait as this was where most of my measurements where off.)  Then I fused the lining to it and pinned the batting to that.

The next step was so hard I did not take detailed pictures during it.  I had to sew the lining to the outer (right sides together) but I also wanted a clean line on the part where I sewed up the sides.  After trial and error I finally got it correct. Here are a couple of me testing the length and folding process.


At this point a small "inspector" came along to check on the quality of my fabric!

Finally I sewed a hook and eye inside and put a pretty decorative button on the outside!  Here is the final product!!!!

                                 The pretty button!                                The hook and eye 
                                                                              (I wish I had done a different closure.)

                                         Open                                              Inside

 The back


Here is a picture of us after our date!

Tuesday, January 24, 2012

Long overdue update on corset!

I promised an update on my corset and never got to it!  I made an underdress and cloak to go with it!  Purple and green are my favorite colors and I love butterflies so I used those things to make the outfit!  Here is a picture of me at the Ren Faire in full garb!!!! 


I was very comfortable wearing it while standing.  Then we sat down to eat... that did not go so well.  I do love it though!  I did get to wear to other side of my corset (it is reversable) as part of my pirate outfit but did not get a good picture of me in that.

The cloak was a lot of fun to make.  I special ordered the trim and clasps.  They go perfectly with the fabric!  It was also a great weight because it can be rather warm at the faires.  I would like to make a heavy one too for when it is cooler outside.

Friday, April 8, 2011

Underbust Corset for Renaissance Faires

I go to Renaissance Faires every year.  I have 3 different outfits I have worn in the past.  This year I am making another new one.  My baby is almost 6 months old and therefore still breastfeeding.  None of my old outfits will work to feed him in.  So I started a new outfit.  A simple underdress with a underbust corset that I wear with my own undergarments.

I started searching online and I found a few great websites to help get me started.  And since credit must be given where credit is due... these are the two that helped me the most with how to get started and what supplies I would need.
I wanted it to be simple but also fun.  We go to different type of Ren Faires.  Some are more historical while others are more fantasy.  That is why I wanted to make sure it was reversible.  I also wanted to make it out of fabric that I already had.

These are the first pictures I took of it.  It is double sided with butterflies on one side and plain green on the other side  Since then I have made it shorter (I am very short waisted.)  I had to take out all of the boning, cut it to the right length, and then reinsert the boning.


Here are pictures of it with the grommets in place.  I had to get a special tool for these grommets as my cheapy one was not strong enough.


It will be trimmed in black satin.  I will post finished pictures when I finish the dress it will be worn with.

I have plans for at least one more corset like this... okay two more now that I think about it!

Over a year since I posted!

I can't believe it has been so long since I posted a sewing project on here!  I have lots of updates to create posts from so as long as I keep at it there should be plenty more posts in the near future!

This is my current list of projects:
  • My Ren Faire Dress (mostly done)
  • My Ren Faire Corset (mostly done)
  • My Ren Faire Cape
  • Husband's Ren Faire Cape
  • Bella's Green Ren Faire Dress (very easy)
  • Bella's Purple Ren Faire Dress (very easy)
  • Bella's Ren Faire Cape
  • Bear's something for the Ren Faire (not too sure on this one)
  • Jane Austen inspired Nursing Regency Dress with bodiced petticoat
  • Summer Dresses for my Daughter
Most of that has less then a month to get done.  Guess I know what I will be doing on my husband's days off!

Monday, March 8, 2010

My New Book!

I have been frustrated with sewing lately.  Patterns just are not fitting me right.  So I bought a new book instead of patterns and I am so excited to get started!


In this book you use your exact measurements to cut out a piece of muslin or other similar in expensive fabric (adding some inches for seams.)  Then you pin the muslin to yourself while wearing a thin undershirt.  From this you create pattern blocks.  They then show you how to turn those blocks into basic wardrobe pieces.  There are some shirts I am really excited about.  I have some fabric to make some summery stuff out of the patterns.

I had been getting discouraged because I bought a pattern and when I tried to tissue fit it and it was so ill fitting (even though in my size) I was shocked!  I could not even continue and said I did not want to sew anymore.  But I got over it and found this book.

Now if I can just find where my daughter put my measuring tapes I will be reading to go!